
Let’s connect over FOOD while we physically distance!
“Mmmmmm… that delicious smell! Reminds me of grandma…” Have you ever had a smell or taste bring you back to a time and place you cherish? Or a favorite family dish you serve around holidays or celebrations that you just can’t do without?

Spice up your summer by trying new flavors and food adventures. Story Tapestries’ Staff,
Board, and Donors have contributed recipes from around the world that have a special meaning to them. Come back each week for new inspiration! Share your photos of the new dishes you prepare on social media then tag us using the hashtag #STSweetStories.
We hope you ENJOY!
Have your own recipe and story you’d like to share? Fill out this simple FORM or email us at administrator@test.storytapestries.org to submit!
Recipe #15 Week of October 12, 2020
To watch Chef Jonathan Bardzik prepare this dish LIVE, be sure to join us for A Taste of Story Tapestries! You’ll hear the story behind the recipe, and have an opportunity to ask questions and hear tips and tricks from the master chef himself! If you would like to prepare the dish along with him over the course of the evening, use the recipe below to pick up the ingredients you’ll need.
Recipe contributed by Celebrity Chef and Storyteller Jonathan Bardzik – tune in LIVE October 16th for the STORY!
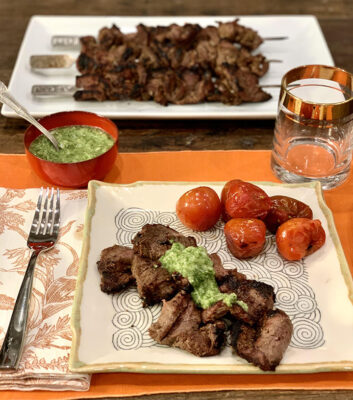
 Pumpkin Curry
Serves 6
Inspired by the unforgettable pumpkin curry at Washington, DC’s Thai X-ing restaurant, I grabbed a rich, sweet Japanese Kabocha squash and created a quick at home version that tastes wonderfully bright, fresh and complex.
Ingredients:
4 tbs peanut or vegetable oil, divided
1 Thai eggplant or small Italian eggplant, cubed
1 large red pepper, thinly sliced
1 onion, diced
3 cloves garlic, minced
3 tbs Panang (spicy) or Massaman (mild) curry paste
1 1/2 cups chicken or vegetable stock
3 lime leaves
1 Thai Bird chile or ½ Jalapeño, thinly sliced
6 cups Kabocha or butternut squash peeled and cut in 2” cubes
1/2 can coconut milk
1-2 tbs fish sauce
Lime juice
3-4 sprigs Thai basil
Directions:
Warm 2 tbs of oil over medium-high heat in a 3 quart sauté pan. Add eggplant and red pepper. Cook 5 minutes until browning on edges. Remove from pan and reserve.
Return pan to heat with remaining oil. Add onion and cook until softened. Add garlic and cook 30 seconds until fragrant. Add curry paste and cook an additional 1 minute until fragrant.
Add vegetable stock, lime leaves, chiles and squash. Partially cover and simmer for 5 minutes until squash is just fork tender. Return eggplant and peppers to pan. Add coconut milk and simmer 5 minutes longer.
Season to taste with fish sauce, lime juice, salt and pepper. Serve tossed with Thai basil sprigs.
To watch Chef Jonathan Bardzik prepare this dish LIVE, be sure to join us for A Taste of Story Tapestries! You’ll hear the story behind the recipe, and have an opportunity to ask questions and hear tips and tricks from the master chef himself!
Recipe #14 Week of September 28, 2020
Recipe and Story contributed by Celebrity Chef and Storyteller Jonathan Bardzik
Recipe #13 Week of September 21, 2020
Recipe and Story contributed by Celebrity Chef and Storyteller Jonathan Bardzik
Award Winning
 Early in my culinary career, I was awarded cooking’s top honor. It was presented by Tina, who together with her son, Archer, regularly visited my farm market cooking demos. The week in question, I was cooking Brussels sprouts: blanched, sliced thinly, and tossed in a vinaigrette.
Even among the most adventurous of the under-five-year-old dining set, these small, cabbage-y tasting treasures are rarely tolerated, mush less beloved. Saturday morning, however, Archer reached for seconds. If that wasn’t enough, his mom said, “he eats every vegetable you cook, you can’t seem to go wrong…and you can share that.”
So I do, glowing with pride. And to prove that I have a heart, I served Archer pumpkin pancakes the very next Saturday. He earned it.
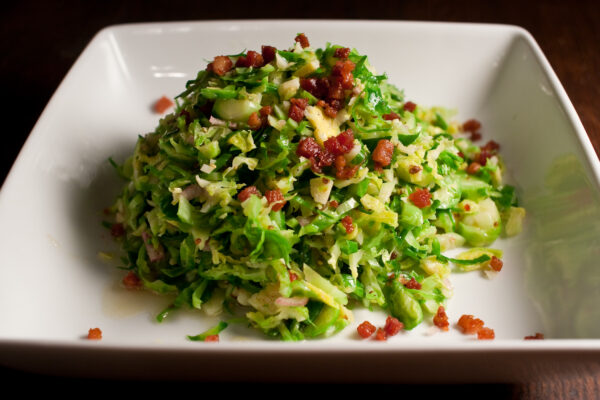
Cider and Mustard Brussels Sprout Slaw
Serves 6-8
Who knew Brussels sprouts could taste light and fresh? This salad just gets better over time as the dressing lightly wilts the sprouts and the sharp vinaigrette blends with salty-rich pancetta and the earthy sprouts.
Ingredients:
4 cups Brussels sprouts, about 1 pound, bottoms trimmed and halved
1/2 cup plus 1 tbs olive oil – the good stuff!
1/2 cup diced pancetta
1 shallot, minced
1/3 cup apple cider vinegar
2 tbs sharp, grainy mustard
Directions:
Add Brussels sprouts to salted, boiling water and cook for 1 minute until bright green. Remove and place in an ice bath – a mix of 50% water and 50% ice. When sprouts are cool, drain and pat dry.
Warm 1 tbs oil in a small skillet over medium heat. Sauté pancetta until crispy. Remove to drain on paper towels. Thinly slice Brussels sprouts and place in a bowl with enough room to toss with the dressing.
Whisk together shallot, apple cider vinegar, and mustard, with salt and pepper to taste.
Pour remaining ½ cup oil into the dressing in a thin stream, while whisking. This will form a creamy emulsion.
Dress Brussels sprouts with half of the dressing and all of the pancetta. Let rest 5-10 minutes and season to taste with additional dressing as needed.
TIP: Boiling vegetables until crisp-tender and shocking them in ice water to stop the cooking is called blanching. It’s a great way to take the raw edge off of vegetables like green beans, asparagus, and broccoli for a crudités platter.
NOTE: I know, I’m not using the Pancetta fat in this recipe. You can save it and use it to fry up eggs for breakfast tomorrow.
Recipe #12 Week of September 14, 2020
 All the difference
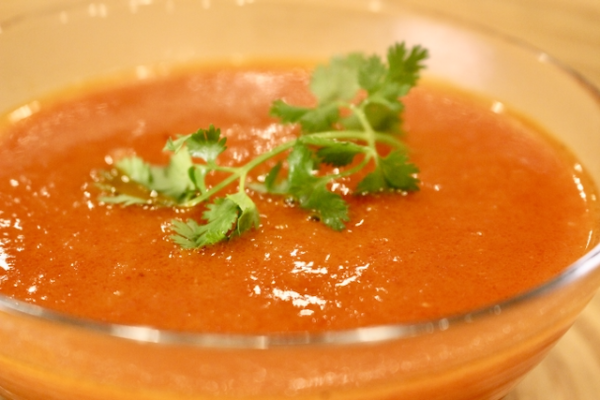
Recipe #11 Week of September 7, 2020

Recipe contributed by “Aunt Jean” Bowman, Story Tapestries supporter and Development Director Lorienne Beals’ Aunt; Story told by Lorienne.
Every summer, the first weekend of August, the Ball-Huntington family would get together. We’re talking 50+ family members gathering from across the country to meet in the Finger Lakes region of New York to enjoy a weekend of barbecuing, horseshoes, singing, card games, campfires and general good times and great food. As a kid, I eagerly looked forward to this weekend of time with family members I only saw that one time each year. I learned how to whittle (well, I spent many hours observing – never really tried myself…) from my cousin Cris and got beat multiple times at air hockey, learned how to identify some constellations in the summer night sky, and all the “kids” kept out of the way of the “men” playing horseshoes. Thankfully Ruth Ann is an avid documenter, always with a camera in hand and taking time over the course of each year to meticulously put together photo albums to help us memorialize the years and years of family history that circled around this one weekend-a-year gathering. She also became passionate about genealogy and put together extensive documentation of our family tree going back as far as she could, and sharing the stories she gathered with us all. One of the dishes that remained a staple year after year is Aunt Jean’s infamous broccoli salad. What follows is a version that offers a perfect summer side dish that will keep in the fridge for up to 3 days so you can make a larger batch if you’d like. There are many variations you can try out, so experiment and add or subtract ingredients to your liking!
Broccoli Salad
Ingredients
Salad
- 1 pound broccoli florets (from 1 ½ pounds broccoli stalks), thinly sliced and then roughly chopped (mix with cauliflower if desired)
- ½ cup finely chopped raw carrots
- ½ cup raw sunflower seeds or slivered almonds
- ½ cup finely chopped red onion
- ⅓ cup raisins
Honey mustard dressing
- ⅓ cup extra-virgin olive oil
- 2 tablespoons apple cider vinegar
- 1 tablespoon Dijon mustard
- 1 tablespoon honey
- ¼ teaspoon fine sea salt
Mix the dressing and pour it over the salad ingredients. Let it soak in for at least 1 hour before serving. Delicious for up to 3 days after preparation.
Favorite add-ins: crumbled bacon, shredded cheddar cheese, crushed walnuts
Recipe #10 Week of August 31, 2020

Recipe and Story contributed by Celebrity Chef and Storyteller Jonathan Bardzik
***
This is from my cookbook Seasons to Taste: Farm-fresh Joy for Kitchen and Table
The last day of summer.
Growing up in New England, summer ended with the return to school. I remember trading in shorts for corduroy pants and long sleeves. Somehow, the first day I returned to school there were already leaves to crunch underfoot and bowls of McIntosh apples set out for a snack between soccer and dinner. It signaled the abrupt end to days spent freely outdoors pursuing a schedule limited only by your imagination. It was when reading again became homework.
As an adult summer’s end isn’t marked by your car pulling away from a cabin or cottage – kids in the back and luggage strapped to the top. You don’t count down the last seconds by watching the ocean or a serene lake shrink out of sight in your rear view mirror. The grand finale doesn’t occur when you put away the sprinklers you ran through barefoot as often as they were used to water the garden.
No, summer’s end comes with one final harvest, served in a bowl. It’s the last of the eggplant, basil, and zucchini, the straggling tomatoes and tough green beans, cooked in a single pot to coax out one last taste of the season’s produce, bold and fresh. They take many forms from Mom’s caponata and my Aunt Ali’s soupe au pistou to rich ratatouille and hearty minestrone.
These dishes, then, aren’t a tearful goodbye. They are a hug. Just like the one you get from your Mom on the first day of school. It says, “don’t worry, summer will return soon enough.”
***
Join Jonathan for more food and stories on his Instagram: https://www.instagram.com/jonathanbardzik/
Watch Jonathan cook up stories and savory bites at our 10-year anniversary celebration: A Taste of Story Tapestries.
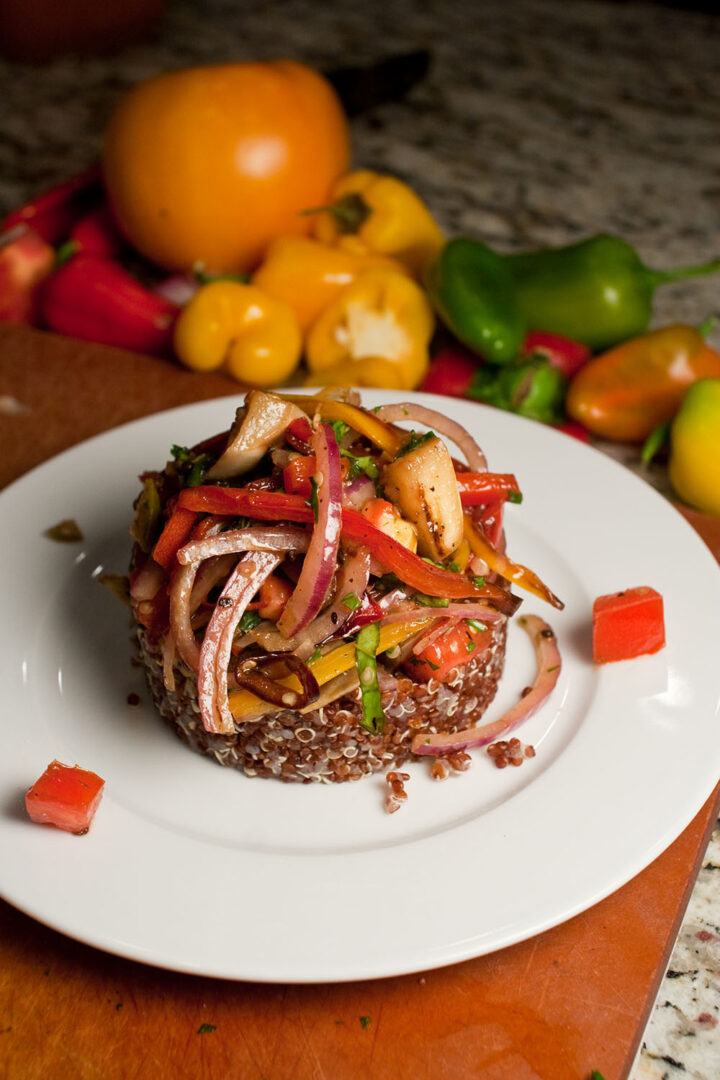
Caponata Quinoa Salad
Serves 6-8
From summer through fall, any time my parents visit, there is food harvested fresh from their garden and put up in her freezer. It always includes rich caponata, a classic Italian blend of eggplants and peppers, tomatoes, basil and capers. This dish captures those flavors in a one-dish vegetarian homage to the end of summer.
Ingredients:
- 1 1/2 cups red quinoa
- 2 cups water
- 3 tbs olive oil
- 3 small eggplants cut in 1/2” dice
- 2 medium sweet peppers, thinly sliced
- 3 tbs capers
- 1 large tomato, diced
- 1/2 red onion, thinly sliced
- 2 tbs chopped basil
- 1/4 cup chopped parsley
- 2 cloves garlic, minced
- 1/3 cup red wine
- 1 tsp Dijon mustard
- 2/3 cups olive oil – the good stuff!
Directions:
Cook quinoa: Rinse quinoa several times under running water. Place quinoa in a small saucepan with water and a pinch of salt. Cover and bring to a boil over high heat. Reduce heat to low and cook until water is completely absorbed, about 15 minutes. Remove from heat and let sit, covered, for 15 minutes longer. Cool to room temperature.
Cook vegetables: Meanwhile, warm 2 tbs oil in 12” skillet over medium heat. Cook eggplant until lightly browned on all sides, then reduce heat to medium-low and cook until fork tender. Remove from pan.
Warm 1 tbs oil over medium heat and add peppers. Cook until tender, about 5 minutes. Add capers and cook until fragrant, 1 minute longer.
Assemble salad: In a large bowl combine reserved eggplant and peppers with tomato, onion, basil and parsley.
Make vinaigrette: Mash garlic into a paste with a pinch of coarse salt.
Whisk together garlic, vinegar and mustard. Drizzle oil into vinegar, while whisking, to form a creamy emulsion.
Dress salad and serve over quinoa.
Tip: Eggplant can easily stick to the pan. Using the full two tablespoons of olive oil and browning the eggplant over medium heat prevents sticking while reducing the heat after browning prevents it from burning.
Recipe #9 Week of August 24, 2020
Gazpacho
Contributed by Christopher Brush
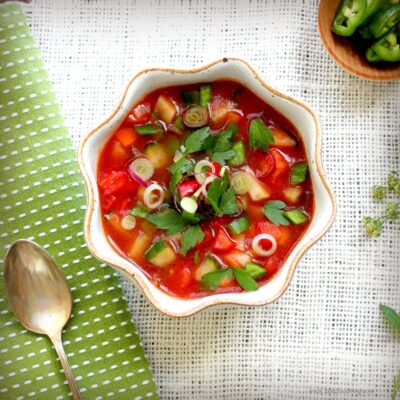
In late summer, when ripe produce is plentiful and at its peak, gazpacho is a great way to take full advantage of the garden’s bounty. Perhaps not fully traditional, this hearty cold soup makes a great late summer lunch or supper. It can serve as a base for a delicious corn salsa or be thickened to fill hollowed-out cucumbers that stayed on the vine a little too long. You may want to vary the seasonings to your tastes, but this is a good starter.
Makes about 2 quarts
- 1 – 12-oz can V8 vegetable juice (or similar)
- 1 tsp. salt
- 1 tsp. each rosemary, thyme, dill
- ½ tsp. white pepper
- 1 lime, juice of (~2 tsp. – may add in ½ tsp. grated zest)
- 2 tbsps. balsamic vinegar
- 1 pkt. unflavored gelatin
- 2 good-sized, ripe tomatoes
- 1 stalk celery
- ½ cucumber
- 1 green bell pepper
- 1 cubanelle pepper
- 1 small zucchini
- 2 cloves garlic, crushed
- 3 tbsps. olive oil
In a glass bowl or large glass measuring cup, mix juices, seasonings, and vinegar. Pour gelatin over the surface of the juice mixture and set aside for gelatin to soften (absorb liquid). As it moistens, it will expand and the surface will wrinkle. Jiggling it a bit from time to time will help it moisten evenly.
Finely chop all the vegetables and mix with the garlic and olive oil in a large mixing bowl. Use a stick blender to partially puree mixture. Keep blender head deep to avoid blending in too much air. You are likely to need to dislodge chunks of veggies that get caught in the side slots several times before reaching the consistency you desire. I like some chunks left, but you can blend it pretty smooth if you prefer.
When all of the gelatin has softened (no apparent loose granules), place it in a microwave for a minute or two, till gelatin has melted. You may need to stir it and zap it another minute to fully melt. It does not need to boil – just get very warm. Stir juice mixture into vegetable puree till evenly distributed.
Cover and refrigerate several hours or overnight. Check salt and seasoning. You may want to add a little salt, lemon juice, or hot sauce to adjust savor, tang, or bite. Serve cold.
Great served with melba toast, breadsticks, tortilla chips, or a hearty cornbread.
For a summer corn chowder, scrape kernels off of 3 ears of blanched corn (4-5 mins in boiling water), stir in 3-6 cups of gazpacho, and adjust salt to taste.
Recipe #8 Week of August 17, 2020
Pão de Queijo
Contributed by Arianna Ross and Family

Many people associate food with family and my story is no different. We are a multi-ethnic family with a father from Brazil and a mother with roots in Russia. In addition, I, Arianna Ross, a.k.a. “mom,” must follow a strict gluten free diet. We are constantly searching for food that fits our diet and makes us feel content! As we are currently living in the US, I try to make food for my husband that brings up memories of his childhood while helping my children understand where they come from in the world. Pão de Queijo makes the whole house smell delicious and fills our bellies. I consistently double the recipe as my children could finish 20 rolls of this cheesy delicious bread in ONE SITTING!!
Ingredients
- 2 large eggs*
- 2/3 cup extra virgin olive oil
- 1 and 1/3 cup milk
- 3 cups (170 grams) tapioca flour
- 1 cup of parmesan cheese
- 2 teaspoons of salt (or less, to taste)
*It helps when baking with eggs to start with eggs at room temperature. If you don’t plan ahead (that would be me, usually) you can put the egg in a bowl of warm water for a few minutes to gently take off the chill of the fridge.
Method
1 Pre-heat oven and grease the muffin tins: Preheat the oven to 400°F. Spread a small amount of butter around the insides of each well of a mini-muffin tin.
2 Blend ingredients: Put all of the ingredients into a blender and pulse until smooth. You may need to use a spatula to scrape down the sides of the blender so that everything gets blended well. At this point, you can store the batter in the refrigerator for up to a week.
3 Pour into mini-muffin tin: Pour batter into the prepared mini-muffin tin, not quite to the top; leave about 1/8 inch from the top.
4 Bake: Bake at 400°F in the oven for 15-20 minutes, until all puffy and nicely browned. Remove from the oven and let cool on a rack for a few minutes.

Recipe #7 Week of August 10, 2020
Cabbage Soup and Creative Variations!
Contributed by Sue Snyder, with thanks to Gussie Blassberg and Ruth Blassberg-Cohen
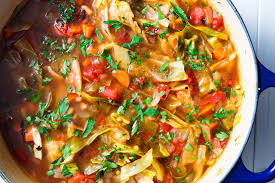
My belief in creative thinking comes out of my tinkering nature, and tinkering with recipes is a given in my kitchen. Grandma Gussie Blassberg left Lithuania at age 13, coming to Turners Falls, Massachusetts. Her daughter, Ruth, was my mom. Cabbage soup was a staple in our house, where there was lots of love, many opinions, and not much money. Basically, Russian Cabbage Soup is something like:
- 1 tbsp unsalted butter
- 1 onion, peeled and sliced thin
- 1 carrot, shredded
- 2 potatoes, peeled and diced small
- ½ medium head cabbage, shredded
- 2 bay leaves
- 6 cups beef stock
- 3 large tomatoes diced, or 2 cups canned, diced
- Prunes or raisins
- Salt and pepper to taste
Serve with:
- Fresh or dry dill
- Sour cream
Instructions:
- Melt butter in a large pot. Add onions and carrots and sauté until golden – 3-5 minutes. Add potatoes, cabbage, bay leaves, and beef stock. Cover and simmer 20 minutes.
- Add tomatoes with any juice and mix well. Add salt and pepper to taste. Continue to simmer until tomatoes are heated through.
- Serve with a garnish of dill and sour cream if desired.
The other day I was craving cabbage soup, but wanted to include things my granddaughters liked, such as sliced carrots, chicken, and rice. I started out with the recipe above but made substitutions. I didn’t have bay leaves. I used low salt chicken stock instead of beef stock. I grabbed a package of already diced onions, and a package of fresh chicken tenderloins.
Here’s how it went:
- Brown the chicken in the butter along with raw veggies.
- Cut up a package of cilantro/lime chicken sausage to brown along with the above.
- Add some cooking wine along with the chicken stock and everything that has to cook for a while.
- Add some turkey rub seasoning.
- Use Craisins instead of raisins.
- Add some edamame – otherwise, there’s nothing green to be seen.
- Wash, cut up, and throw in a whole package of dill – there’s never too much dill!
- Stir in a cup or more of cooked jasmine rice.
- Cook late at night, simmer for a while, turn off the stove, and let sit until morning.
- Serve the next day with sourdough or crusty bread.
It’s more like a stew than a soup. Everyone loved it and there was enough for several meals! Next time I’m going to cut things into slightly smaller chunks and add a package of frozen riced cauliflower!!!
The bottom line is that just like ancestors gave us a heritage of strengths and dispositions to navigate the world, which we reimagine to become our legacy, recipes are guides that are meant to be tinkered with because innovation and invention are artful ways to be in the world. If you can imagine the taste in your mouth and it seems OK, give it a try!
Recipe #6 Week of August 3, 2020
FOOD and the ARTS are the universal languages of the World!
Contributed by Mimi Hassanein, Story Tapestries Board Member
My name is Mimi Hassanein. I’m from Egypt. I immigrated to America fifty years ago. I have three children and fifteen grandchildren! When I came to America I did not know how to speak English. Like most immigrants when they come here, I developed a sixth sense – communicating by body language or deciding what is inside the box by looking at the picture on the box. ![]()
I was invited to Back to School Night. I remember my daughter coming home and so excited to tell me her teacher told her to tell your mom to come to the school tonight and she gave me a paper that said PTA meeting tonight at 7:30. I immediately looked at my daughter, yelled at her, and asked her, “What did you do wrong at school? Why does the teacher want me to go to this meeting?” My daughter started to cry and told me she did not do anything wrong at school. So I took the paper and went to my neighbor to ask her, “Why do I need to go to school tonight?” She explained to me the importance of going to Back to School Night, said I must go and she would pick me up.
We went to school and I sat through the whole presentation given by the principal and kept nodding my head and smiling, pretending that I understood what he was talking about. Of course, I did not understand anything. ![]()
Then comes the second part of the meeting, when you go to your child’s classroom and meet with the teacher. The same thing happened. But because I wanted to know how I could help, I waited until everyone left and then told the teacher I want to help. So she told me to volunteer at the Valentine’s and Halloween parties. I looked at her and told her NO Halloween and NO Valentine’s parties, so she asked me if I could bake something for a bake sale to raise money for the school. Immediately I looked at her and said, “YES! I make good Egyptian Baklava.” She looked at me and said, “Me too! I make good Greek Baklava!!”
Shortly after, as I learned to speak English, I joined the PTA. After serving for many years, I received a lifetime service award from the Montgomery County Council Parents Teacher Association.
Here is the recipe that helped me make my first point of connection!

- One package of phyllo dough
- 2 cups of ground walnuts. If you like more you can always add! No more than 3 cups in total.
- 2 teaspoons of ground cinnamon
- 2 sticks of butter
- 1 teaspoon of vanilla
- 2 cups of sugar
- 1 1/2 cups of water
- 1 teaspoon of lemon juice
Directions:
Preheat the oven to 350ºF. Melt the butter in a small saucepan. Have a cookie sheet ready to lay out the phyllo sheets. Brush the cookie sheet with butter so the dough won’t stick. Layout 2-3 sheets of phyllo dough at a time, brushing with butter between layers. Once you’ve laid out half of the phyllo dough, mix the ground walnuts and cinnamon and spread the mixture over the dough. Continue with the same layering process to finish laying out the phyllo dough. After brushing the final layer with butter, you can cut the dough into bite-sized squares.
Put the pan in the preheated oven for 25 minutes or until golden brown.
In the meantime, prepare the syrup. Mix the sugar and water together first, and then add the lemon juice. Cook for 12 minutes on high heat. Don’t let it get too thick! It should have the same consistency as honey. Let the syrup cool down before pouring over the baklava.
ENJOY Mimi’s famous Egyptian baklava!
Recipe #5 Week of July 27, 2020
Mother versus Daughter Five Can Chili and more
Contributed by Barbara Ann Baugh and Valerie Baugh-Schlossberg
This recipe I thought I came up with and shared with my mother. However, in all truthfulness, she probably came up with it first. Growing up my mother was never confident in her cooking and made a lot of things from boxes and cans, but she was and still is a master of bean dishes, soups, and stews.
I never appreciated her culinary foray into these hearty dishes until I moved to NYC for my acting career. The need to tightly budget my money mixed with the cold winters triggered my memories of my mom’s hearty meals and inspired me to cook many of them.
A few years after I left New York, ten years ago, my mother was diagnosed with esophageal cancer and had to receive all nourishment via a nasal tube for about 6 months. During that time she watched cooking channels all of the time. She said it was a way to inspire what she had to look forward to after her treatments and surgery. After cancer, my mother has evolved into someone who now loves to cook and takes her health and diet very seriously.
I make this chili when I need comfort food or am in a financial bind. However, my most memorable moment was during a hurricane shelter in place. My roommate and I didn’t have a can opener and used a screwdriver and a hammer to open the cans, (that alone was an undertaking). Anyway, I always have the cans needed for this hearty meal in the pantry. I hope you enjoy making it for yourself, your family, and friends.

Mom’s 5 Can Chili aka. American Style Chili by Barbara Ann Baugh
Ingredients:
- 2 cans Beans (drained and rinsed) I like to use 1 can dark kidney beans and 1 can cannellini beans.
- 1 can corn (drained and rinsed) (for extra flavor use Southwest or Mexican corn)
- 1 can diced tomatoes (if you like it hot use Mexican Style or Rotel)
- 1 can diced chili peppers
- Taco seasoning to taste
- 1 tsp turmeric (prevents gas)
- Sour Cream
- Cheese
- Avocado
Directions:
Empty the first 4 ingredients in a large pot with turmeric and heat thoroughly. Add taco seasonings to taste. Garnish with cheese, avocado, and sour cream.
I eat beans every 3rd day to balance my diet. Beans are rich in fiber and potassium which aids in pain relief. Tomatoes are full of antioxidants and are immunity builders.
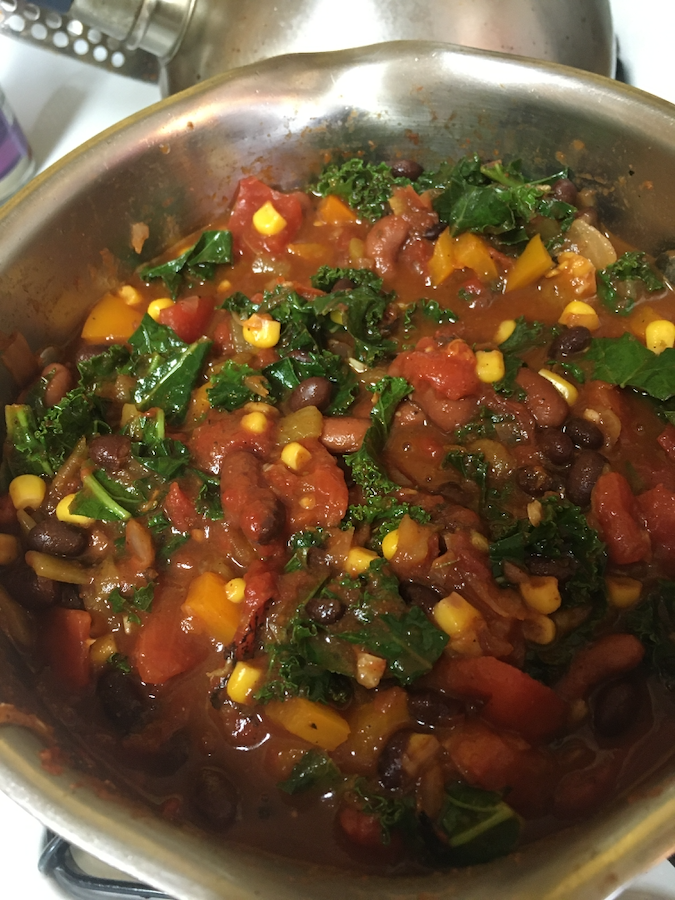
Valerie’s Everything’s in the Pantry Five Can plus More Chili by Valerie Baugh-Schlossberg
Ingredients:
- 1 can of kidney beans (drained and rinsed)
- 1 can of black beans (drained and rinsed)
- 1 can of pinto beans (drained and rinsed)
- 1 can of corn
- 1 can of green chilis
- 2 cans of diced tomatoes (I like the fire-roasted kind)
- Cumin
- Chili powder
- Salt
- Pepper
- Taco seasoning
- Garlic 2-3 cloves minced or pressed
- Olive oil, 2 tablespoons
- ½ to a whole onion chopped
- 1 green or red bell pepper
- 1 bunch of kale destemmed and roughly chopped (optional)
Garnish with:
- Sour Cream
- Cheese
- Avocado
Directions:
I start my chili by chopping one onion and either a green or red bell pepper. Sauté in a large pot until the onion and green pepper begin to soften. Add cumin and chili powder to taste. I use 1-2 tablespoons each, depending on how potent I want the flavor. Add all the cans of ingredients. Heat thoroughly then add garlic (I add the garlic later in the process because I don’t like overcooked garlic), salt, pepper, and taco seasoning to taste. To make it extra healthy I add an entire bunch of kale. Right before it starts to simmer, I add the kale and stir it into the chili. Add more seasoning if needed. Simmer for 15 minutes or until the kale is softened. Garnish with cheese, sour cream, and avocado. Serve with tortilla chips.
Recipe #4 Week of July 20, 2020
Contributed by Christopher Brush and Steve Barker
Like many, when the pandemic hit, families found themselves suddenly together 24/7. The independent lives of households suddenly converged as daily commutes and schedules of the outside world fell by the wayside. Suddenly, we all had more time to sleep, to make meals, and to learn people with whom we share our lives.
This was especially true for our new managing director/former board treasurer Steve Barker. Steve, and his partner Chris, suddenly found they had a life that allowed for a little more morning exercise before a quick shower and quick breakfast prior to telecommuting for work.
While it’s nice to make breakfast from scratch every morning, the reality soon became clear that the new pandemic schedule required a pandemic breakfast. We couldn’t make an omelet every morning. The pandemic sheet quiche was born out of the necessity of convenience.
Steve wanted something quick and delicious. Breakfast quiche was already a staple of the house. So the challenge was how to take spinach, mushroom, cheese, pepper, and egg and make it last a week.
Chris is an experimental cook. Give him ingredients and let him play. He is always riffing on previous dishes. He excels at pastry crust. So he thought, make the pie crust on a rectangle sheet, build up the sides, and pour the filling. Let’s see what happens.
Luckily, it worked and the result quickly became a staple for the foreseeable future. Since Chris rarely writes a recipe down, we were fortunate to get this one. Cut into servings of 20, each piece comes into about a little less than 400 calories.
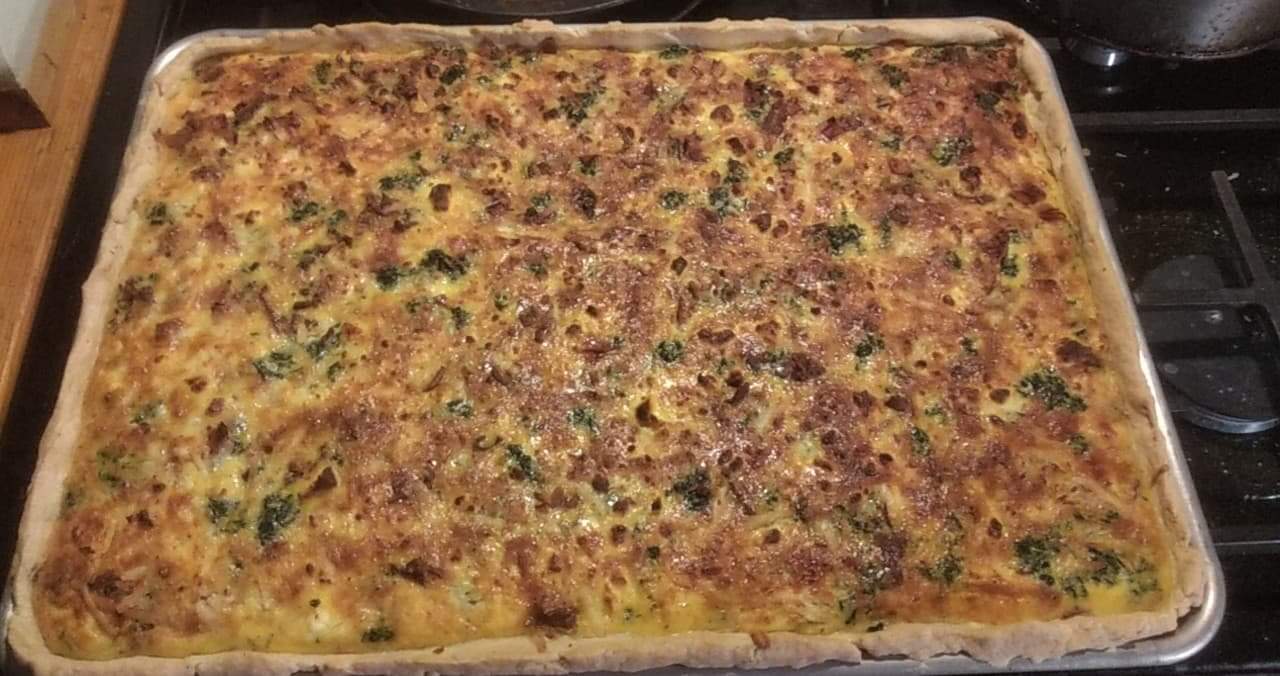
Sheet Pan Quiche
- Serves 18-20
- 12×17 sheet cake pan with a high lip on all sides
- Oven 350 F
Crust
- 1 cup (2 sticks) butter, softened
- 3 oz. cream cheese softened
- 4-1/2 cups flour
- 2 tsp. salt
- 1/3 cup vodka + cold water to 3/4 cup
- olive oil
Blend softened butter and cream cheese thoroughly and rechill. Blend flour and salt. Cut in compounded butter till butter is in small chunks – about 1/4″. Add vodka/water and toss gently with a fork, working drier flour from the bottom, till generally moistened (still pretty crumbly). Press gently into the dough, spreading, folding, and inverting it just to incorporate all the loose flour. Once the dough holds together, wrap in plastic or waxed paper and chill an hour or so.
Filling
- 2 – 1-lb packages of cut/chopped frozen spinach, thawed (leave in the fridge overnight)
- 8 oz each – Jarlsberg, Asiago, and Mozzarella, coarse-grated and mixed
- 1 Tbsp. rosemary
- 1 Tbsp. thyme
- 2 tsp. oregano
- 1 tsp. ground black pepper
- 1 Tbsp. garlic powder (more or less to taste)
- 18 large eggs
- 2-1/2 cups milk
- 2 tsp. salt
Place all of the spinach in a screen sieve and firmly press out as much water as practical (a lot of water). Transfer spinach to a medium bowl and loosen it, breaking up chunks as much as possible. Mix all of the herbs, garlic, and pepper together. Add some of the herb mix to the spinach, toss to mix, and repeat till all of the seasonings are incorporated. Set aside. In a large bowl, mix all the grated cheeses so they are well mixed. Set aside.
Cover your pastry-rolling surface with plastic or waxed paper. I use 2 sheets about two feet long and overlapping by about 4-5 inches on the long edge. I roll out the pastry on a 15×20″ board and tuck the ends of the wrap under the ends to hold it in place. This also serves as a great size guide, since 15×20″ is about how big you’ll need to roll it. Place the chilled dough in the middle and roll it out – rolling forward/back and side-to-side to create a big 15×20″ rectangle. Once rolled out, place your rolling pin across the middle and lift/fold the pastry over it, using the rolling pin to lift it over the sheet pan. Center the pastry so it hangs over all edges roughly evenly. Smooth it into the pan and press with your fingers into all the edges to make sure it is snugly in place. Starting at any corner, peel back the wrap at a low angle till it is all removed. Use your fingers to roll up the excess pastry at the edges, pinching it into a continuous ridge around the rim (about 1/2″ tall). You can cut a little from spots with more excess to bulk up spots with less. Sprinkle with a couple of Tbsps. of olive oil and distribute evenly. Prick crust with a fork at about 1″ intervals so there are tiny holes across the whole bottom (prevents steam pockets forming and lifting a hump in the middle of your quiche).
Assembly
Sprinkle about 1/3 – 1/2 of the grated cheese evenly into the crust. Sprinkle the spinach/herb mix lightly and evenly over the cheese – DO NOT PAT IT DOWN. You want all of the ingredients and fluffed and even as possible. Sprinkle remaining cheese evenly over the top.
In the now-empty cheese bowl, beat the eggs well. Add salt and milk and blend well. Use a measuring cup to pour egg mixture over cheese and spinach evenly, working your way around the edge, then across the middle, back and forth, till all is coated and egg is evenly distributed.
Bake at 350 F for 60-65 minutes till the surface is a rich brown.
Cool and slice into 18 (3×6 pieces) or 20 (4×5 pieces). Extra pieces can be wrapped singly or in pairs (separated by waxed paper) and refrigerated or frozen. It is better reheated in a toaster oven, but a microwave works fine too.
You can use most any cheeses you like or add meats or other veggies as you prefer. Be aware of the saltiness of other ingredients and adjust salt for the egg mixture up or down accordingly.
Recipe #3 Week of July 13, 2020
Contributed by “Grandma” Natalie Ross
“The wonderful smell of pumpkin always reminds us of Thanksgiving. But you don’t have to only make pumpkin bread in November. I love the aroma all year ’round! Here is an easy and fabulous recipe for Pumpkin Bread that I got from a neighbor when my children were growing up.
ENJOY!!!”

Pumpkin Bread
Cream together:
- 2/3 cup butter
- 2 cups sugar
Add to above:
- 4 eggs
- 1 lb can pumpkin
(I add 1 tsp almond and vanilla extract in honor of my grandmother who added them to her yummy apple pie crust!)
Combine, sift, stir in:
- 2/3 cup water (if I have juice, I’ll use it instead or mix it with water)
- 3 1/3 cups flour
- 2 tsp. baking soda
- 1 1/2 tsp salt
- 1/2 tsp baking powder
- 1 tsp cinnamon
- 1 tsp cloves
(optional) Add:
- 1 cup raisins or cranberries (dried)
- 1 cup walnuts (crushed)
Pour into two loaf pans – DO NOT GREASE!!!!
Bake at 350 for 60-70 min. Test by inserting toothpick. It seems to take longer in my oven.
ENJOY!!!
Recipe #2 Week of July 6, 2020
Contributed by Nonprofit Consultant, Heidi Webb, CFRE
“When I became a vegetarian, I had to learn to create dishes that would feed my family and encourage their participation in this new lifestyle. It was my very first “special” meal, and it is our family favorite…I make it once per month!”
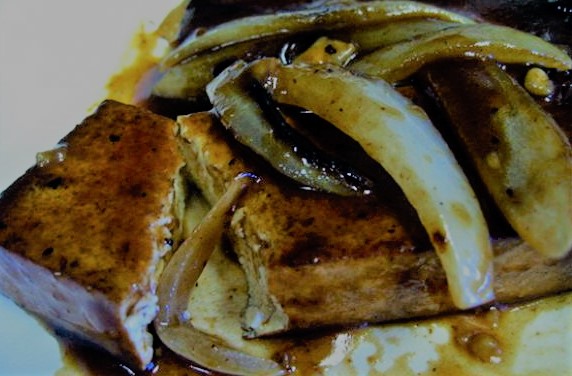
Tofu Steak
INGREDIENTS
- 1 package of firm Tofu
- 1 tsp minced Ginger 1/2 cup of low-sodium Soy Sauce
- 1 Tbsp of sugar
- 2 Tbsps of chopped white or yellow onion
- 1 Tbsp Mirin
- 2 tsp sugar-free Maple Syrup
- 1/4 cup Water
- 1 Tbsp chopped Scallions
- 1 Tbsp Sesame Oil
- 1 tsp Sesame Seeds
INSTRUCTIONS
- Pull out your tofu and wrap in a paper towel.
- Stir together water, soy sauce, mirin, sugar, maple syrup, spring onions, sesame oil, and ginger in a bowl. If you like a bit of spice also add a dash or two of red pepper flakes.
- Mix your favorite flour with salt and pepper on a dinner plate.
- Cut the tofu in 1/2-inch wide slices (left-to-right on the shortest side of the rectangle)
- Cover the the slices with the flour mix
- Heat frying pan over medium heat with a table spoon of sesame oil.
- Pan-fry tofu and onions.
- Once lightly browned, pour in teriyaki sauce mixture and simmer into a glaze.
- Pull out, plate (should be two pieces each for a family of four).
- Top with sesame seeds and scallions, and serve hot.
Recipe #1 Week of June 29, 2020
“My husband made his first flight from Italy to the US in early September 2009 to meet me and my family. To share some of his own family traditions with mine, he brought several special ingredients to prepare dishes from his region of Italy – Vicentino. As a special treat, he prepared semifreddo, which is a version of homemade ice cream. He brought mandorlato, which is a dessert made in Cologna Veneta with egg whites, honey, sugar and almonds, traditionally enjoyed around the Christmas holiday. There are many variations of mandorlato, also called torrone, but the most traditional version is prepared so it is crunchy and for this dish, you crumble it and mix it into the cream so you find delightfully crunchy bites of this sweet treat while savoring the semifreddo. As a frozen dessert, semifreddo is perfect to enjoy in the summer and it’s become a family favorite for my American family members, too. I’ve included Alessandro’s original version of the recipe in Italian, passed down from his Zia Bruna, and I’ve translated it into English.”
Contributed by Development Director, Lorienne Beals

Semifreddo al mandorlato
Ingredienti / Ingredients:
- 500 gr di panna dolce – whipping cream
- 5 rossi d’uovo – egg yolks
- 120 gr di zucchero – sugar
- 100 gr di gocce di cioccolato fondente – mini dark chocolate chips
- 200 gr di mandorlato – Can’t find it at your local grocery store? Order it on AmazonSmile and your purchase gives back to Story Tapestries!
- 2 caffè ristretti (la moka piccola) – an espresso (or as close as you can get…)
Preparazione / Preparation:
Sbattere le uova con lo zucchero, aggiungere lentamente il caffè, poi il mandorlato, aggiungere il cioccolato e infine la panna montata. Mettere nel freezer in uno stampo rivestito con stagnola o carta da forno a lasciare per almeno 8 ore prima di servirlo. Se va lasciato per giorni nel freezer è bene coprirlo del tutto.
Whip the cream. Beat the egg yolks with the sugar, slowly add the coffee, then the mandorlato. Add the chocolate chips and finally the whipped cream. Put it in the freezer in a mold lined with aluminum foil or oven paper. If you leave it in the freezer for more than 1 day, it’s a good idea to cover it completely. Normally needs at least 8 hours to fully set, but depends on your freezer.
MORE SUMMER FUN!
Looking for other ways to have fun this summer? Be sure to check out our online Summer performances, workshops, and more!